So, in part 1 we described the problem. Now, let’s take a look inside and start to plan a solution.
What’s inside?
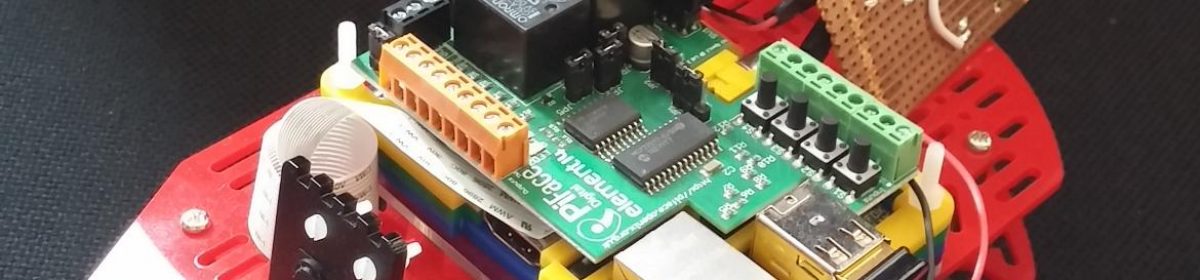
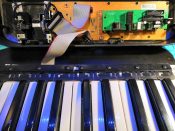
As you can see from the picture below, the whole system consists of three circuit boards. If you can only count two, you’re not concentrating! There’s one peeping at you through the gap between two of the keys (C and C#, for those of you that are of a musical bent).

The small green board we saw the other side of in part 1 – this houses the brain (the 8051 MCU), connections to the outside world (MIDI, a pedal input, USB and power) plus connections to the other boards. The large brown board houses all the knobs, sliders and LEDs on the keyboard’s control panel, while the keyboard keys themselves sit on top of the third board, of which much more in a later post.
The boards are handily separated in function, and connected to each other using ribbon cables. This makes me very optimistic about the feasibility of this project – it’s much easier to hack something which is designed like this – the functions are obvious, clearly separated, and easy to connect to something else.
What we’re going to do is replace the brain, so we’ll introduce another board of our own, and connect the ribbon cables to that instead, giving it access to the keyboard input, and the control panel.
So, how are we going to do all of that? Well…
We have a plan…
It’s always a good idea to start a project like this with some idea of the order in which we’re going to do things.
Why plan?
Firstly, it helps to focus on achieving something useful early, so that we can see if we’re on the right track.
Secondly, it helps to break the problem down. There is nothing more demoralising than feeling like you have to solve so many problems in order to complete the project. If we break it down, we can focus clearly on one problem at a time, and forget about everything else while we solve that one problem.
Finally, and perhaps most importantly, we can ensure the early stages of the plan are reversible if possible. This means that if our early attempts fail, we haven’t destroyed what we started with which is, after all, a sort-of working keyboard!
So, here’s our plan:
Step 1 – Fit our new “brain”, and connect it to the keyboard
Getting the keyboard connected is fundamental, if we can’t get that to work, then there really is no point in going any further. We can have a midi keyboard controller without the control panel, but not without a keyboard!
Here we will decide what to use for the new “brain”, fit it physically into the case somewhere, and somehow connect it to the keys so we can detect when a key has been pressed.
Step 2 – Sending MIDI messages
This fits into the category of achieving something useful early. If we can send MIDI messages which tell an instrument to play a note when the appropriate key is hit, then we have a working midi keyboard. We could stop here and we’d have something useful, but of course we won’t!
Step 3 – Connect the control panel
Now we’ll connect the control panel, with all its knobs, sliders and LEDs. We don’t know what we’ll do with them yet, but that’s fine. We can take some ideas from the original manual.
Step 4 – Connect to the outside world
You may wonder why we’re doing this last, the reason is that it is a potentially destructive step. To connect nicely to the outside world, it might be useful for us to use the original green circuit board. All of its connectors are spaced correctly for the holes in the case. However, all we’ll really want to use will be those connectors, and perhaps the voltage regulator circuitry. Ensuring we can do that without waking up the original brain and having it interfere is likely to involve some butchery, so we’ll do this last.
Plans can change
So, that’s our plan of attack. It’s important not to consider it too rigidly. It gives us some idea of the overall picture, but as I said earlier, the beauty of having a plan is that we can forget, for now, all the steps after step 1! We might change our mind after step 1 about what we want to do next, we may reorder or completely redesign the project. None of that matters for now. Let’s just focus on step 1.
So, we’ll get to that in part 3. In the meantime, if you want to understand a little more about what MIDI is, and where we can find some information to help us to speak its language, all is explained here.